Tutorial 1 – Joint Model Personalization
Tutorial Developers: Robert Salati, B.J. Fregly, Rice Computational Neuromechanics Lab, Rice University
Last Updated: 11/4/2025
The Joint Model Personalization (JMP) tool optimizes joint parameters, body scaling, and marker placement to minimize IK marker distance errors. Reducing inverse kinematics marker distance errors reduces downstream errors in calculated inverse dynamic joint moments, muscle–tendon lengths and velocities, muscle moment arms, and ultimately muscle activations and forces. These quantities are used by subsequent Model Personalization tools.
The inputs to JMP are a scaled generic OpenSim model, kinematic marker data from one or more motion trials, and a JMP settings file. This tutorial will explore the creation of JMP settings file using both the NMSM Pipeline GUI in OpenSim, and by directly editing the settings file in a text editor.
Before running JMP:
The primary input to a JMP run is a scaled generic OpenSim model. JMP is designed for small adjustments to model parameters, so large scaling adjustments should still be done with OpenSim’s Scale Model Tool.
- Open
RCNL2023.osimin the OpenSim GUI. - Open the Scale Model Tool.
- Load the settings file
ScaleSettings.xml. - Run the scale tool
- With the new model
UF_Subject_3_v2.osimselected in the Navigator window, click on the Coordinates window. - Lock
knee_adduction_randknee_adduction_la. The knee adduction angle models varus/valgus deformity and doesn’t change much during gait. The scale tool modifies this angle using static pose data, and then we don’t change it afterwards. - Save the scaled model as
UF_Subject_3_scaled.osim.
To get the most accurate personalization, JMP prefers that “functional joint trials” are used, in which a single joint is moved through its full range of motion. We can visualize these motions using the OpenSim Inverse Kinematics Tool.
- With
UF_Subject_3_scaled.osimselected in the OpenSim GUI, open the Inverse Kinematics Tool. - Load the IK settings files inside IKSettingsFiles
- Run the settings files to visualize the motion trials available to us in this tutorial.
Setting up a JMP settings file:
Activate the NMSM GUI in OpenSim by navigating to Tools>User Plugins, and click
rcnlPlugin.dllOpen
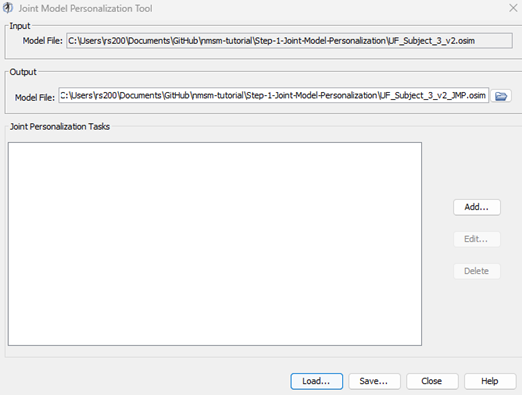
UF_Subject_3_scaled.osimin the OpenSim GUIWith
UF_Subject_3_scaled.osimselected in the OpenSim GUI, navigate to Tools>Model Personalization>Joint Model Personalizationa. The following window should be opened:
Rename the output model file to
UF_Subject_3_scaled_Sequential.osimCreate a new JMP Task:
a. Name this task
Scale Pelvisb. Select the Markers File to be
MarkerFiles\BothHips_markers.trcc. Choose the Markers to be
R_Thigh_Lateral R_Thigh_Superior R_Thigh_Inferior L_Thigh_Lateral L_Thigh_Superior L_Thigh_Inferior R_Asis L_Asis Sacrald. Add a new body to this task:
- Body name: Pelvis
- Scale body: Yes
- Move markers: None
Create a new JMP Task:
a. Name this task
Right Kneeb. Select the Markers File to be
MarkerFiles\RightKnee_markers.trcc. Choose the Markers to be
R_Thigh_Lateral R_Thigh_Superior R_Thigh_Inferior R_Shank_Superior R_Shank_Inferior R_Shank_Laterald. Add a new joint to this task.
- Joint name: knee_r
- Parent frame translation: None
- Parent frame rotation: X-, Y- axes
- Child frame translation: None
- Child frame rotation: X-, Y- axes
Create a new JMP Task:
a. Name this task
Right Ankleb. Select the Markers File to be
MarkerFiles\RightAnkle_markers.trcc. Choose the Markers to be
R_Shank_Superior R_Shank_Inferior R_Shank_Lateral R_Heel R_Midfoot_Superior R_Midfoot_Laterald. Add a new joint to this task.
- Joint name: ankle_r
- Parent frame translation: None
- Parent frame rotation: X-, Y- axes
- Child frame translation: None
- Child frame rotation: None
e. Add a new joint to this task.
- Joint name: subtalar_r
- Parent frame translation: None
- Parent frame rotation: Y-, Z- axes
- Child frame translation: None
- Child frame rotation: Y-, Z- axes
Save the settings file as
JMPSettingsSequential.xmlOpen
JMPSettingsSequential.xmlin a text editor, and explore the document
Running JMP:
Open MATLAB and open
runJMP.min your tutorial directory.Open the project file
Project.prjinside your installation ofnmsm-core.Ensure MATLAB is set up to use multi-processing, not multi-threading:
a. In the bottom left of MATLAB, click the parallel processing icon, and click parallel preferences.
b. In the drop down menu for Default Profile, select Processes.
Run the MATLAB section labelled
Run JMP Sequentiala. With the section selected, press shift+enter to run a section.
Experiment with simultaneous JMP runs:
The previous JMP run personalized all joints sequentially from the ankle upwards. This has the benefit of a quicker runtime but has more error because the personalization of one joint can negatively affect the personalization of another joint. This can be addressed by personalizing all joints simultaneously. Simultaneous JMP runs take much longer to run but have lower error at the end.
To set up a simultaneous JMP run, you need to normalize all marker trials to 101 time points, and concatenate all of them together into one file. This has already been done in MarkerFiles\ AnkleKneeGaitConcatenated_markers.trc.
With
UF_Subject_3_scaled.osimselected in the OpenSim GUI, open a new JMP GUI window.a. This allows us to use the previous JMP run as a starting point for a new JMP run.
Rename the output model file to
UF_Subject_3_scaled_Simultaneous.osimCreate a new JMP Task:
a. Name this task
All Jointsb. Select the Markers File to be
MarkerFiles\ AnkleKneeHipsGaitConcatenated_markers.trcc. Choose the markers to be
R_Asis L_Asis Sacral R_Thigh_Lateral R_Thigh_Superior R_Thigh_Inferior L_Thigh_Lateral L_Thigh_Superior L_Thigh_Inferior R_Shank_Superior R_Shank_Inferior R_Shank_Lateral R_Heel R_Midfoot_Superior R_Midfoot_Laterald. Add a new joint to this task.
- Joint name: ankle_r
- Parent frame translation: None
- Parent frame rotation: X-, Y- axes
- Child frame translation: None
- Child frame rotation: None
e. Add a new joint to this task.
- Joint name: subtalar_r
- Parent frame translation: None
- Parent frame rotation: Y-, Z- axes
- Child frame translation: None
- Child frame rotation: Y-, Z- axes
f. Add a new joint to this task.
- Joint name: knee_r
- Parent frame translation: None
- Parent frame rotation: X-, Y- axes
- Child frame translation: None
- Child frame rotation: X-, Y- axes
g. Add a new body to this task:
- Body name: Pelvis
- Scale body: Yes
- Move markers: None
h. Add a new body to this task:
- Body name: femur_r
- Scale body: No
- Move markers: X-, Y- axes
i. Add a new body to this task:
- Body name: tibia_r
- Scale body: No
- Move markers: X-, Y-axes
Save this settings file as
JMPSettingsSimultaneous.xmlOpen
JMPSettingsSimultaneous.xmlin a text editor of your choice.This JMP run can take quite long to run, so premade results are in
CompletedSettingsFiles
Questions:
In 1-2 sentences, explain how the JMP optimization works.
Why do we prefer functional trials over gait trials? What if we only had gait trials? What joints should we personalize then? Are there any joints we shouldn’t personalize if we only have gait trials? What about other motions such as squatting?
When JMP changes joint or body parameters, it does not automatically move markers unless specifically instructed to. Why would you not want to move markers when personalizing joint axes and scaling bodies?
If JMP has capabilities to scale bodies, why is it recommended to start with a scaled generic model instead of scaling the model entirely with JMP?
The first part of this tutorial used a “sequential” approach to JMP, where each joint is personalized sequentially in its own task. The main benefit of this approach is that sequential JMP runs are computationally faster because the inverse kinematics problem is simpler. What are some drawbacks of the sequential approach?
What are the potential benefits and drawbacks of a simultaneous JMP approach?
Was the calibration for the simultaneous JMP run better or worse than the sequential JMP run?